Why do I require a Google Maps API key? And how do I get one? Both are great questions!
If you’ve been asked to set up a key and send it over to your developers for one reason or another, hopefully this guide will make that process as easy as possible.
Why do I require a Google Maps API key?
Basically, you’ll need an API key if you want to have a Google Map on your website where the bog-standard embedded IFrame is not custom enough.
With the IFrame option, you are extremely limited in terms of control; you can merely set what location the map should display. If you want anything else, you have to start utilising the Google Maps API.
Like what? Things like the styling of the map itself, multiple pins, custom pins, directions, etc. These are all awesome features that are unlocked once we start using Google Maps API.
Check out these two real-life instances we’ve coded up.
Case study: Hotel Juliani
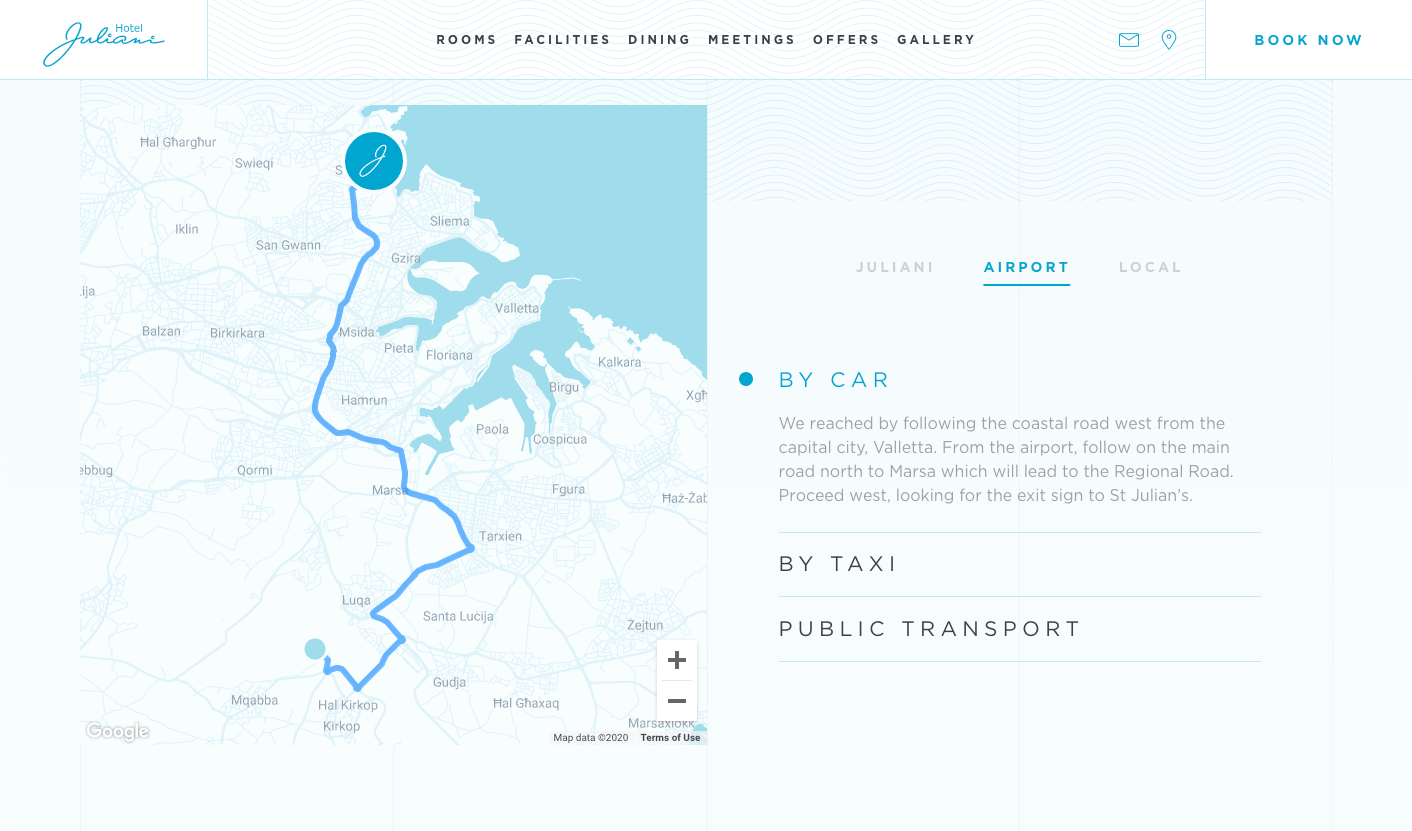
Firstly, Hotel Juliani: https://www.hoteljuliani.com/.
On this widget on the homepage, we’ve restyled the map to use the blue of their branding. We’ve also added a custom pin for the hotel, and we’re displaying the route from the airport.
Case study: Club Quarters Hotels
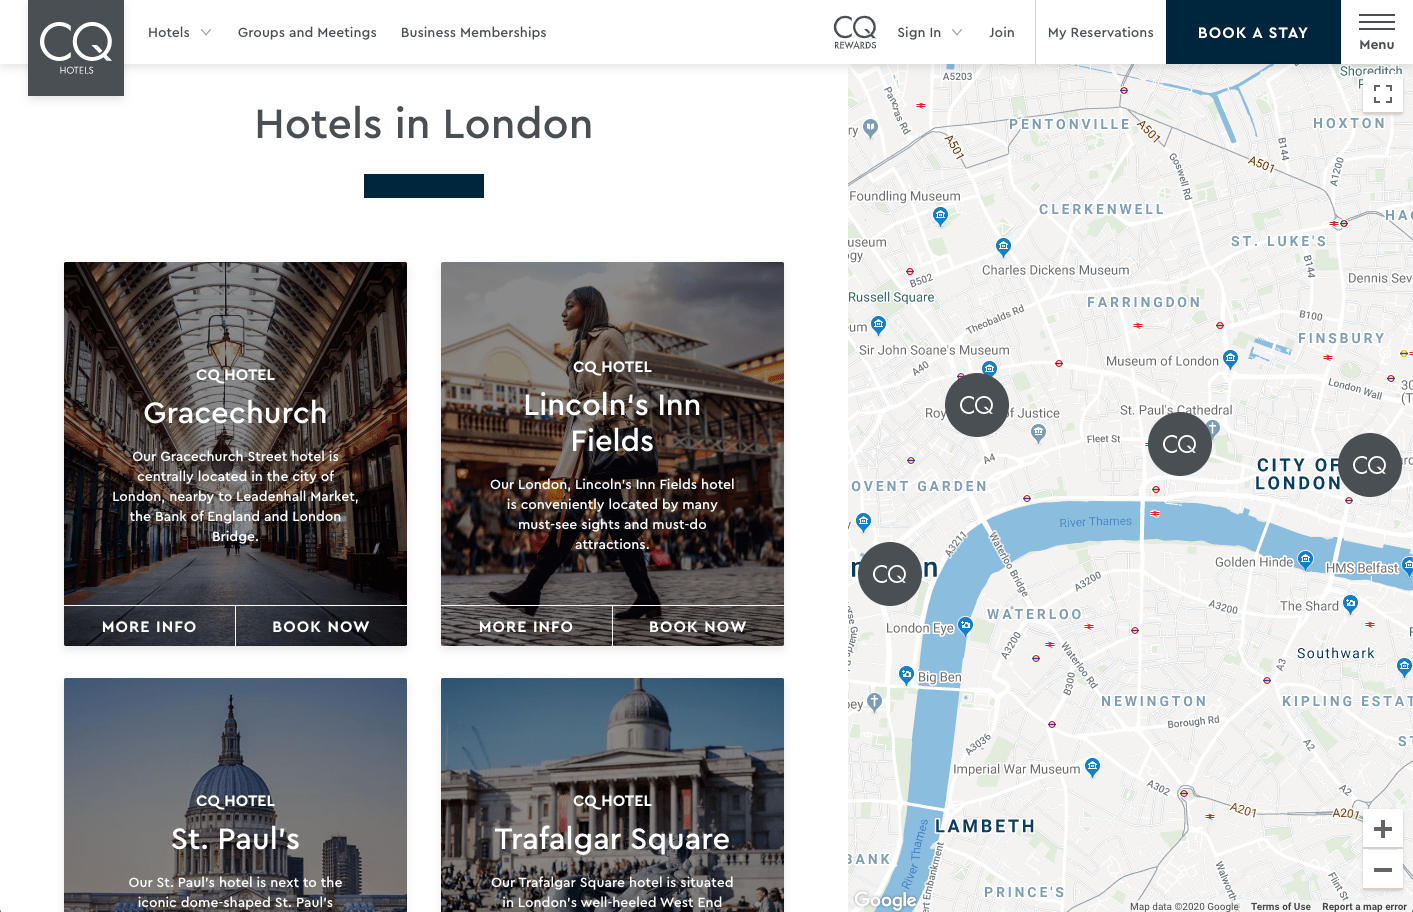
The city page on the Club Quarters Hotels website is another great example: https://clubquartershotels.com/london.
We display the chain’s hotels on the map, all together using custom pins. The map is also restyled to match their branding colours. And, if you click one of the pins, you are linked through to that hotel page. Easy!
So, in order to have awesome maps like these on your site, we need to use the Google Maps API. To do so, we need to set up an account and also generate an API key. This API key is passed through to Google via the coding and allows these extra functions to be used.
I want one! So how do I get one?
There’s a caveat to be aware of: to set up an API key, Google requires billing information.
What, so I have to pay for this?!
Not necessarily. Google mainly uses this as a means of verification. They actually load up the account with a free $200 usage every month, and for 95% of websites, that’ll cover everything. To put it in perspective, that $200 credit will get you 28,500 map loads per month.
Let’s go through the steps!
- Log in to https://console.cloud.google.com/cloud-resource-manager and log in with the Google account you want this Maps API to be associated to.
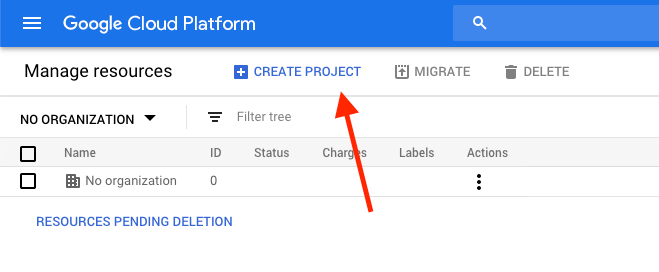
- Click “Create project”
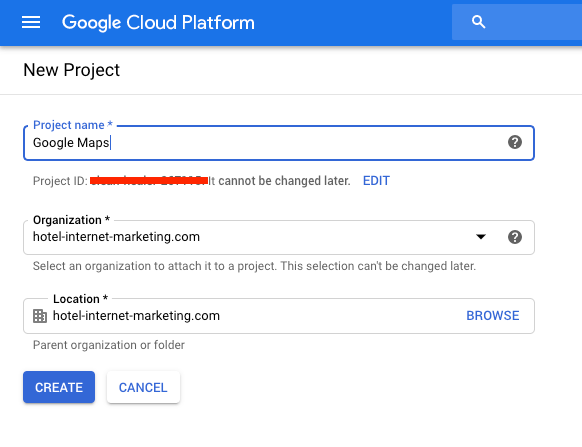
- Give it a suitable name and click “Create”.
- Click the alarm bell icon and click the new project. Alternatively, go to https://console.cloud.google.com/apis/dashboard.
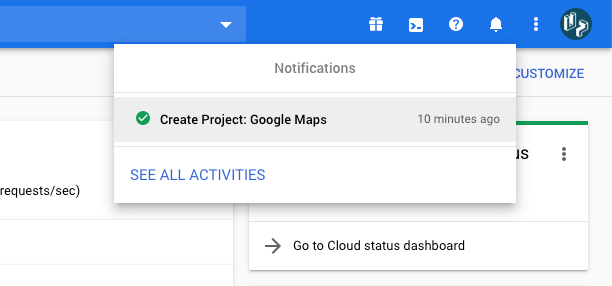
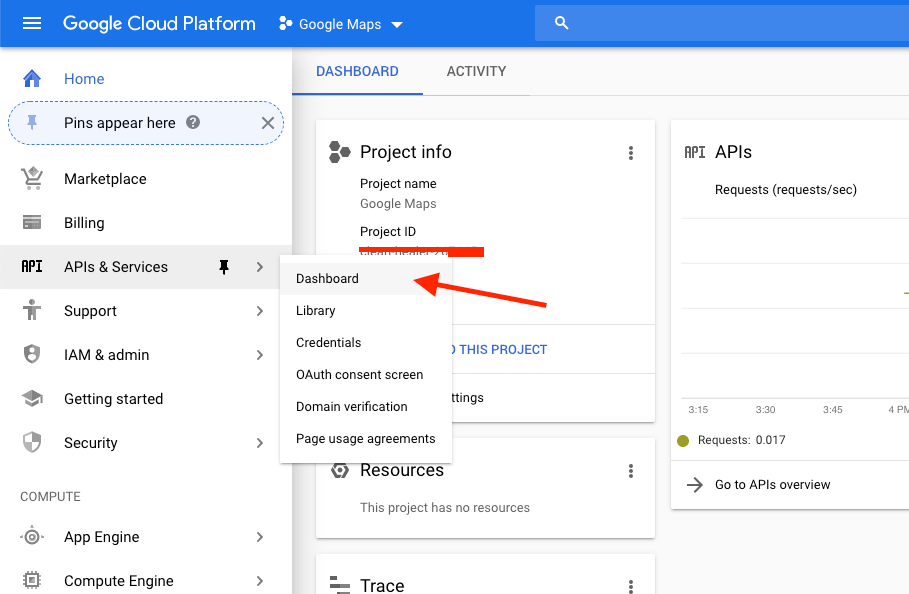
- Go to the APIs & Services Dashboard.
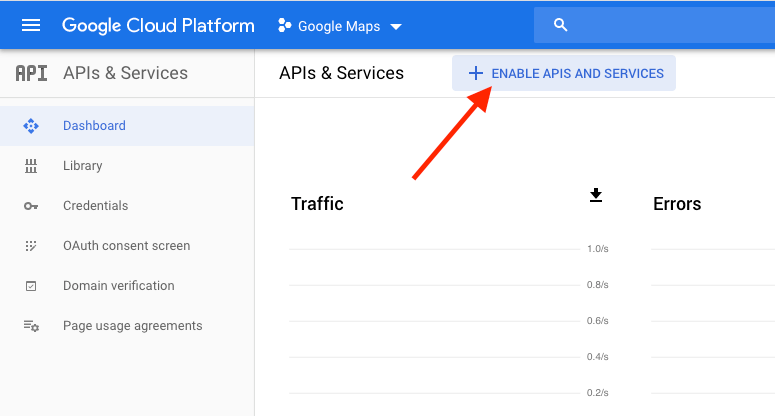
- Click “Enable APIs and services”.
- Search for maps and select “Maps JavaScript API”, then enable it.
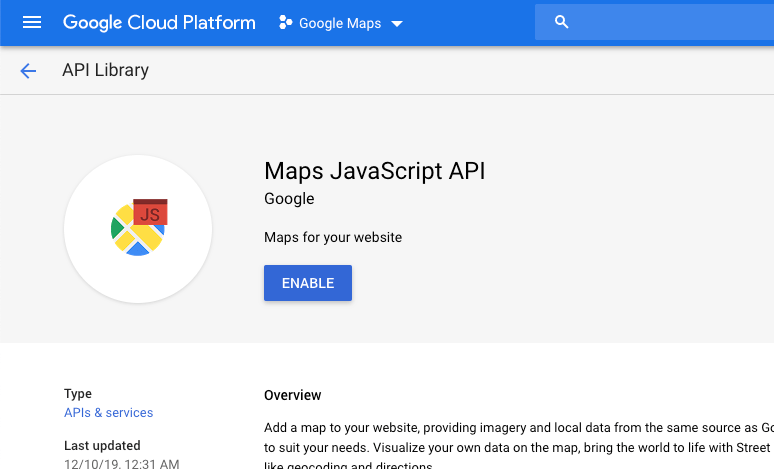
Note: Some sites may also require the Directions API or Places API – your developers should let you know exactly what’s required.
- You’ll then be prompted to create your credentials by clicking the link. Alternatively, go to https://console.cloud.google.com/apis/credentials.
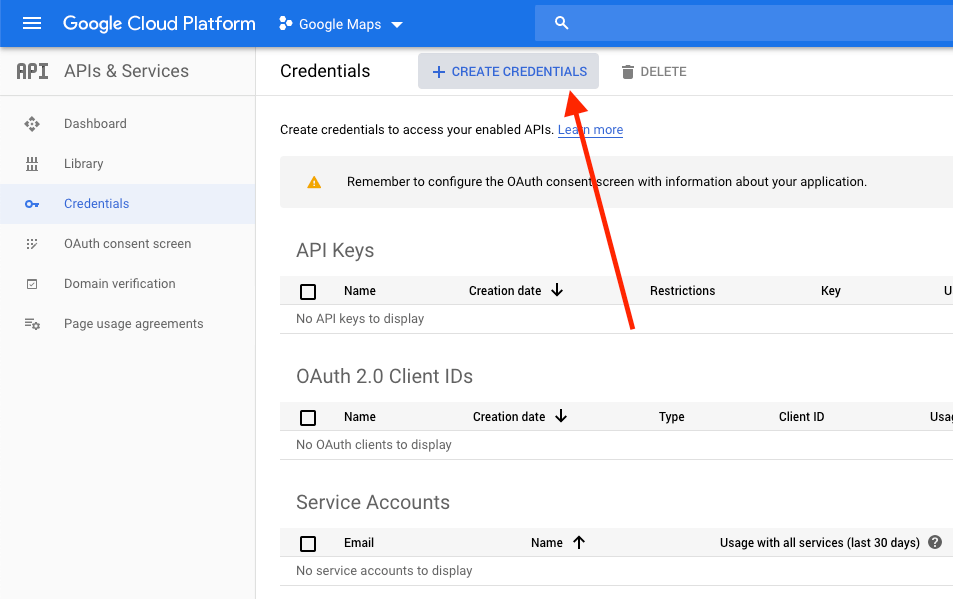
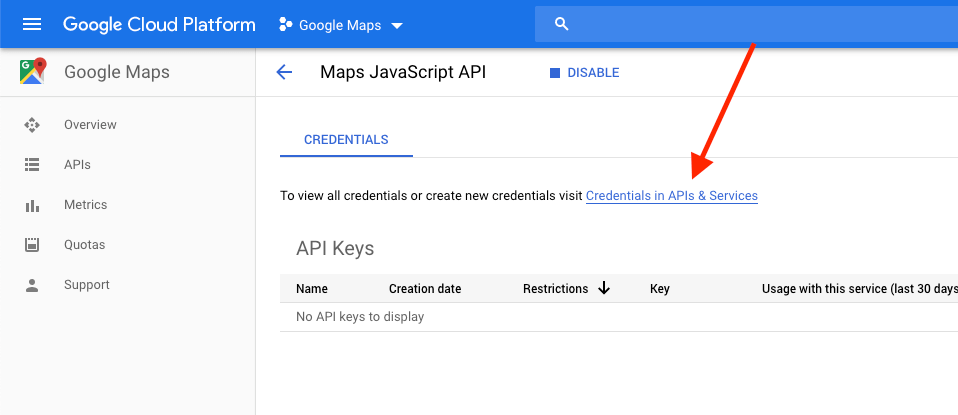 Click the “+ Create Credentials” button, then select “API Key” on the dropdown menu.
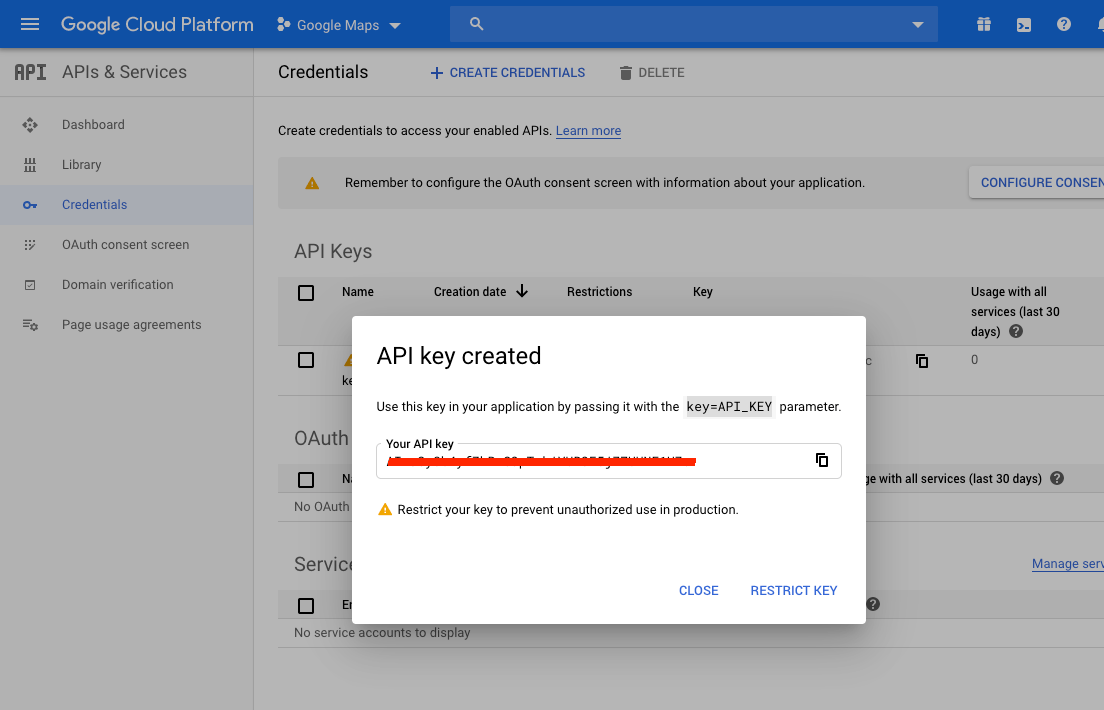
- Congratulations! You have a brand new API key to use on your site. Copy and send this to your developer.The fun’s not over yet, though! Next, we need to restrict access to this API key so that only our site can use it. Then of course, we need to add the billing details.
- Click the “Restrict Key” button on that popup.
- Rename the API key, select “HTTP referrers” as the restriction, and then click “Add an Item”.
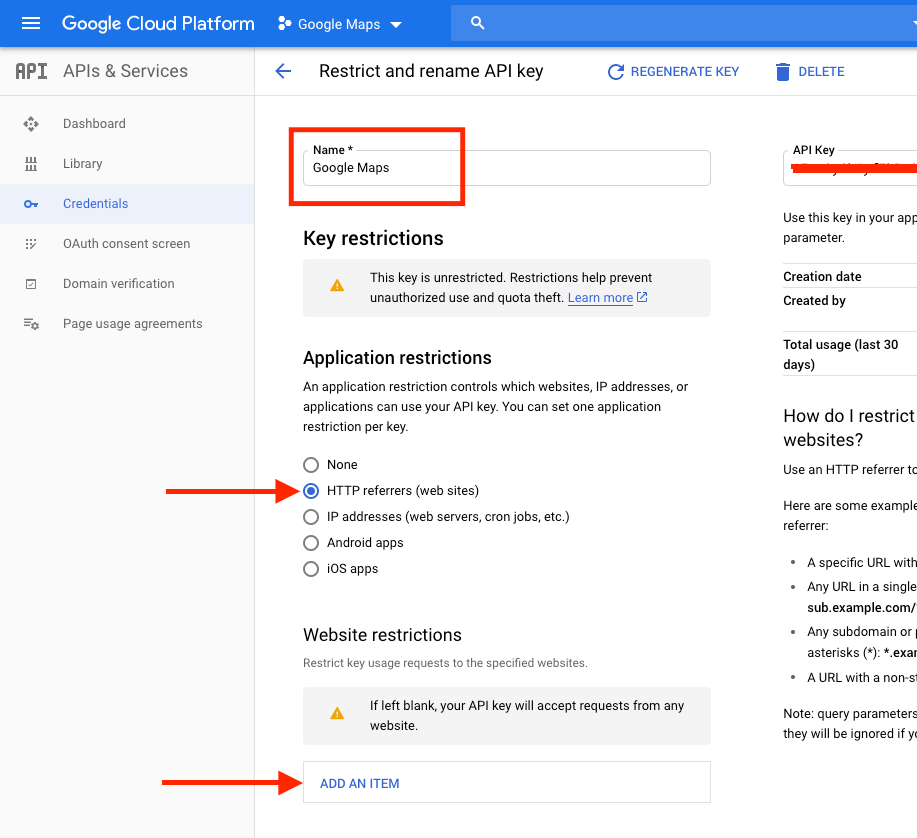 Use the following referrer style: *.websitegoeshere.com/*, such as: *.hotel-internet-marketing.com/*
Here are some examples of URLs that you can allow to set up a referrer:
- A specific URL with an exact path: www.example.com/path
- Any URL in a single domain with no subdomains, using a wildcard asterisk (*): example.com/*
- Any URL in a single subdomain, using a wildcard asterisk (*): sub.example.com/*
- Any subdomain or path URLs in a single domain, using wildcard asterisks (*): *.example.com/*
- A URL with a non-standard port: www.example.com:8000/*
Note: query parameters and fragments are not currently supported; they will be ignored if you include them in an HTTP referrer.
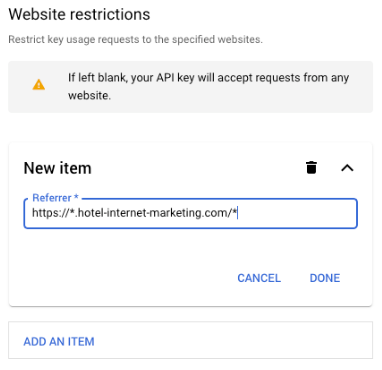 This ensures this API key can only be used on any page on that specific website. Why do this? It stops anyone stealing your key, using it on their own website, and using up all your allowance! Make sure “Don’t restrict key” is selected, then click the “Save” button. If you were to try and use this API key right now, you’d get a pretty ugly warning on your map; and also an error in your console:

So, let’s enable billing!
- Click the menu icon in the top left, then “Billing”, then “Manage billing accounts”, and “Add billing account”.
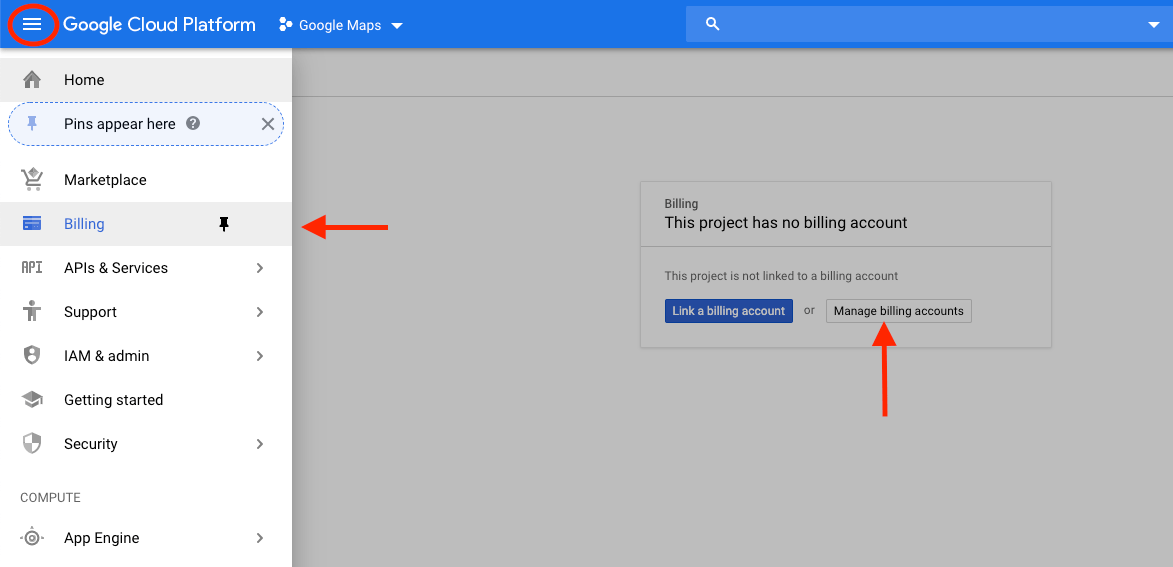
- Follow the steps to add your card details.
- Once billing details are set up, a fresh project will be created and automatically selected. Therefore, go back to the main dashboard, click “My First Project” on the top header and re-select your project.
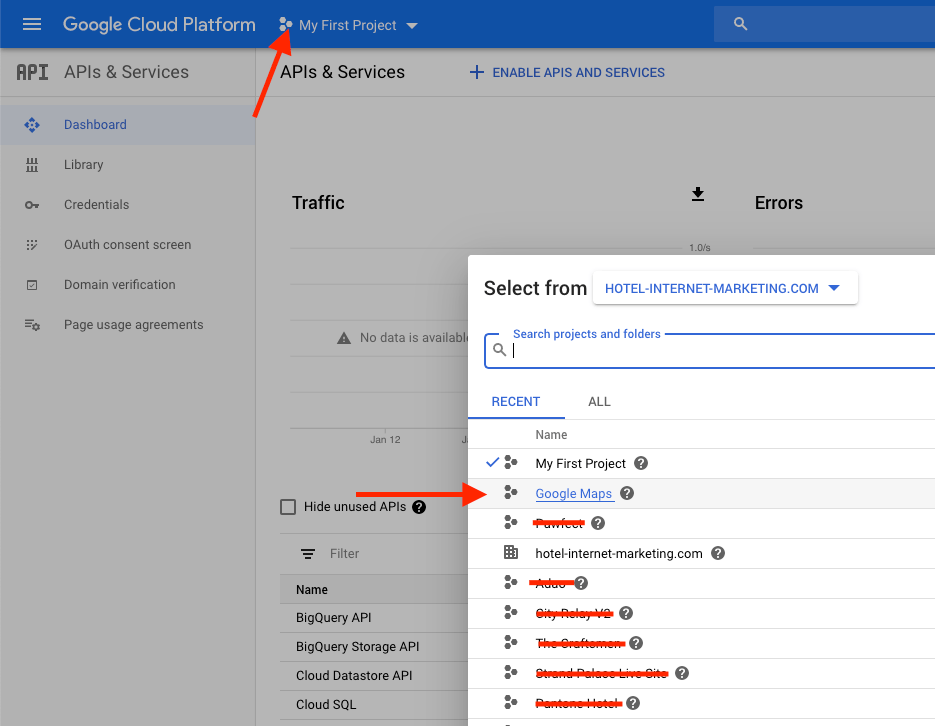
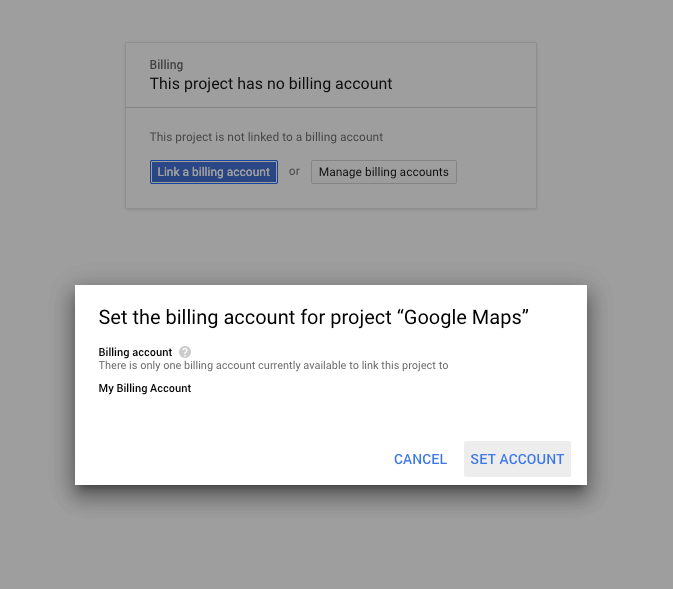
- Click the menu icon, “Billing”, then “Link a billing account”. You can then set that account.
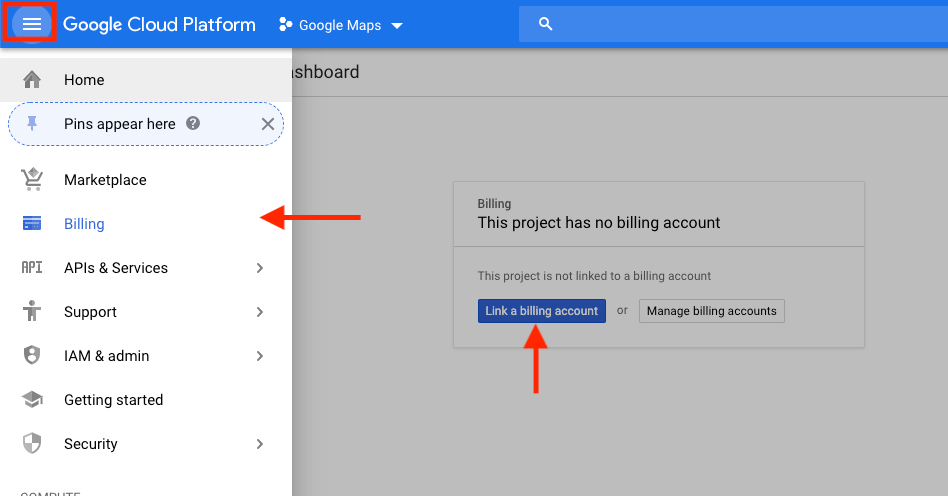
- Finally, we want to set a cap of the free usage so our card is never used! Go to Billing > Budgets & Alerts > Create Budget.
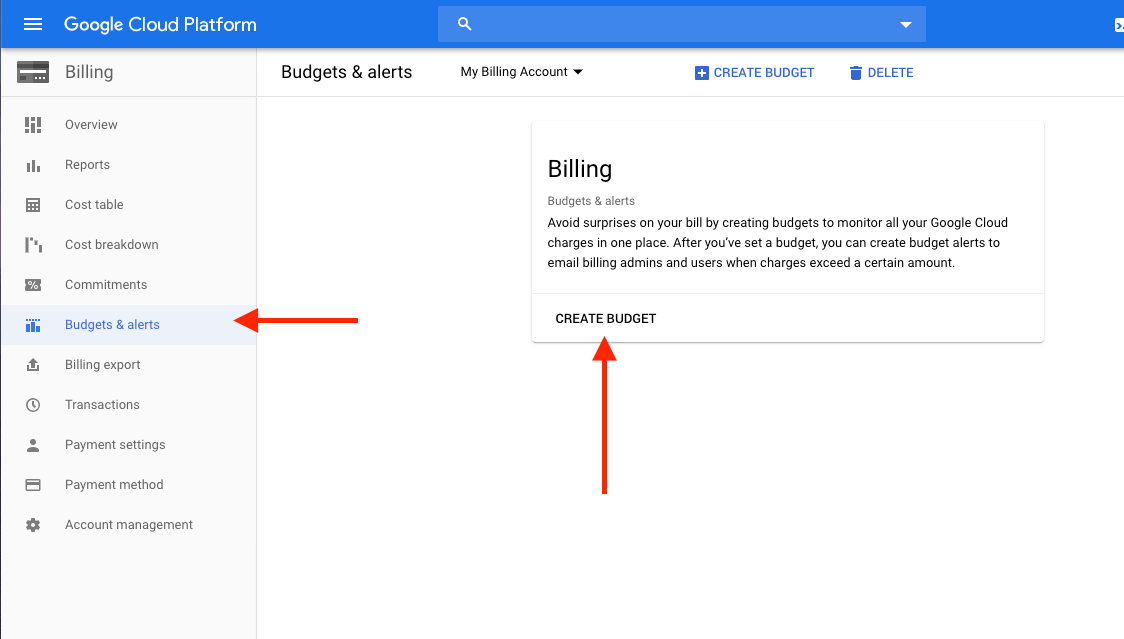
- Give it a name, such as “Free usage”.
- Select “Budget type” – Specified Budget, and the target to be £150, $200 or whatever the equivalent is in your local currency. Keep the “include credits in cost” checked – this will make sure you don’t actually get charged anything!
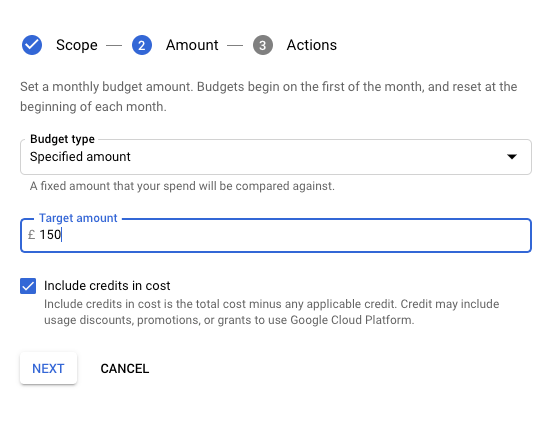
Once you have completed these steps, you will have a working Google Maps API key, with your billing information added, but a handy budget setup so as to avoid any actual charges.
You’re welcome!
UP Hotel Agency is a multi-award winning design and development agency. To discuss how we can build you an award-winning website, please get in touch today!


